

CrowdStrike is a cloud-based software solution that provides endpoint protection, threat intelligence, and incident response services to help sysadmins monitor cyberattacks.
To deploy CrowdStrike on macOS via MDM, download CrowdStrike's provided .mobileconfig profile. Then add it as a custom profile in your MDM solution. As your last step, push the Falcon Sensor application as a custom application to Mac endpoints.
The order in which you complete these steps is imperative to achieving a silent deployment.
The deployment process should follow this order:
Download CrowdStrike's custom .mobileconfig profile.
Upload CrowdStrike's custom .mobileconfig.
Deploy CrowdStrike's custom .mobileconfig profile through your MDM.
Download the CrowdStrike Falcon Sensor application.
Upload the CrowdStrike Falcon Sensor application to your MDM as a custom application.
Create a personalized after-install script to your custom application for licensing.
Auto-deploy the CrowdStrike Falcon Sensor application after the profile has synced to endpoints.
Test your deployment to confirm connectivity.
Note: I recommend following along with CrowdStrike's deployment documentation as you prepare your deployment. |
|---|
1. Download CrowdStrike's custom .mobileconfig profile
CrowdStrike has created an MDM deployment profile customized to give you a fully touchless deployment. The trick is that you must deploy this profile to your Macs before you deploy the CrowdStrike application for the deployment to be fully touchless.
If you've decided to deploy CrowdStrike, you may have encountered the expansive universe of CrowdStrike Support. Lucky for you, I already waded into the waters of the CrowdStrike support pages to find you all the configuration profiles, pkgs, and deployment guides you'll need for this deployment. (You're welcome. I love you, too.)
XML
Here's the current XML payload for the CrowdStrike profile. (The contents of this payload are subject to change.)
<?xml version="1.0" encoding="UTF-8"?>
<!DOCTYPE plist PUBLIC "-//Apple//DTD PLIST 1.0//EN" "http://www.apple.com/DTDs/PropertyList-1.0.dtd">
<plist version="1.0">
<dict>
	<key>PayloadContent</key>
	<array>
		<dict>
			<key>FilterBrowsers</key>
			<false/>
			<key>FilterDataProviderBundleIdentifier</key>
			<string>com.crowdstrike.falcon.Agent</string>
			<key>FilterDataProviderDesignatedRequirement</key>
			<string>identifier "com.crowdstrike.falcon.Agent" and anchor apple generic and certificate 1[field.1.2.840.113635.100.6.2.6] and certificate leaf[field.1.2.840.113635.100.6.1.13] and certificate leaf[subject.OU] = "X9E956P446"</string>
			<key>FilterGrade</key>
			<string>inspector</string>
			<key>FilterPacketProviderBundleIdentifier</key>
			<string>com.crowdstrike.falcon.Agent</string>
			<key>FilterPacketProviderDesignatedRequirement</key>
			<string>identifier "com.crowdstrike.falcon.Agent" and anchor apple generic and certificate 1[field.1.2.840.113635.100.6.2.6] and certificate leaf[field.1.2.840.113635.100.6.1.13] and certificate leaf[subject.OU] = "X9E956P446"</string>
			<key>FilterPackets</key>
			<false/>
			<key>FilterSockets</key>
			<true/>
			<key>FilterType</key>
			<string>Plugin</string>
			<key>Organization</key>
			<string>CrowdStrike Inc.</string>
			<key>PayloadDisplayName</key>
			<string>Web Content Filter</string>
			<key>PayloadIdentifier</key>
			<string>com.apple.webcontent-filter.2C5CBFD0-7CFE-41CB-95BC-A681F4D293B8</string>
			<key>PayloadType</key>
			<string>com.apple.webcontent-filter</string>
			<key>PayloadUUID</key>
			<string>2C5CBFD0-7CFE-41CB-95BC-A681F4D293B8</string>
			<key>PayloadVersion</key>
			<integer>1</integer>
			<key>PluginBundleID</key>
			<string>com.crowdstrike.falcon.App</string>
			<key>UserDefinedName</key>
			<string>Falcon</string>
		</dict>
		<dict>
			<key>AllowedTeamIdentifiers</key>
			<array>
				<string>X9E956P446</string>
			</array>
			<key>PayloadDescription</key>
			<string>Controls the system extension loading/unloading</string>
			<key>PayloadDisplayName</key>
			<string>App System Extension Control</string>
			<key>PayloadIdentifier</key>
			<string>com.apple.system-extensions.admin.E45B5986-74A6-4B6A-A4CA-E179516A7F52</string>
			<key>PayloadOrganization</key>
			<string>CrowdStrike Inc.</string>
			<key>PayloadType</key>
			<string>com.apple.system-extensions.admin</string>
			<key>PayloadUUID</key>
			<string>E45B5986-74A6-4B6A-A4CA-E179516A7F52</string>
		</dict>
		<dict>
			<key>PayloadDescription</key>
			<string>Configures Privacy Preferences Policy Control settings</string>
			<key>PayloadDisplayName</key>
			<string>Privacy Preferences</string>
			<key>PayloadIdentifier</key>
			<string>com.apple.TCC.configuration-profile-policy.9A10BE5D-5E46-4C22-89C9-20597A04B616</string>
			<key>PayloadOrganization</key>
			<string>CrowdStrike Inc.</string>
			<key>PayloadType</key>
			<string>com.apple.TCC.configuration-profile-policy</string>
			<key>PayloadUUID</key>
			<string>9A10BE5D-5E46-4C22-89C9-20597A04B616</string>
			<key>Services</key>
			<dict>
				<key>SystemPolicyAllFiles</key>
				<array>
					<dict>
						<key>Allowed</key>
						<true/>
						<key>CodeRequirement</key>
						<string>identifier "com.crowdstrike.falcon.Agent" and anchor apple generic and certificate 1[field.1.2.840.113635.100.6.2.6] /* exists */ and certificate leaf[field.1.2.840.113635.100.6.1.13] /* exists */ and certificate leaf[subject.OU] = X9E956P446</string>
						<key>Comment</key>
						<string></string>
						<key>Identifier</key>
						<string>com.crowdstrike.falcon.Agent</string>
						<key>IdentifierType</key>
						<string>bundleID</string>
						<key>StaticCode</key>
						<false/>
					</dict>
					<dict>
						<key>Allowed</key>
						<true/>
						<key>CodeRequirement</key>
						<string>identifier "com.crowdstrike.falcon.App" and anchor apple generic and certificate 1[field.1.2.840.113635.100.6.2.6] /* exists */ and certificate leaf[field.1.2.840.113635.100.6.1.13] /* exists */ and certificate leaf[subject.OU] = X9E956P446</string>
						<key>Comment</key>
						<string></string>
						<key>Identifier</key>
						<string>com.crowdstrike.falcon.App</string>
						<key>IdentifierType</key>
						<string>bundleID</string>
						<key>StaticCode</key>
						<false/>
					</dict>
				</array>
			</dict>
		</dict>
		<dict>
			<key>AllowUserOverrides</key>
			<true/>
			<key>AllowedSystemExtensionTypes</key>
			<dict>
				<key>X9E956P446</key>
				<array>
					<string>EndpointSecurityExtension</string>
					<string>NetworkExtension</string>
				</array>
			</dict>
			<key>AllowedSystemExtensions</key>
			<dict>
				<key>X9E956P446</key>
				<array>
					<string>com.crowdstrike.falcon.Agent</string>
				</array>
			</dict>
			<key>PayloadDescription</key>
			<string>Configures System Extensions Policy settings</string>
			<key>PayloadDisplayName</key>
			<string>System Extensions</string>
			<key>PayloadIdentifier</key>
			<string>com.apple.system-extension-policy.20258B06-5866-4424-8893-A3AF1AFAAEDC</string>
			<key>PayloadOrganization</key>
			<string>CrowdStrike Inc.</string>
			<key>PayloadType</key>
			<string>com.apple.system-extension-policy</string>
			<key>PayloadUUID</key>
			<string>20258B06-5866-4424-8893-A3AF1AFAAEDC</string>
		</dict>
	</array>
	<key>PayloadDescription</key>
	<string>System Extensions, and Privacy Preferences</string>
	<key>PayloadDisplayName</key>
	<string>Falcon Profile</string>
	<key>PayloadEnabled</key>
	<true/>
	<key>PayloadIdentifier</key>
	<string>C1A6E28A-21EF-49C6-B85F-84E845731E22</string>
	<key>PayloadOrganization</key>
	<string>CrowdStrike Inc.</string>
	<key>PayloadRemovalDisallowed</key>
	<false/>
	<key>PayloadScope</key>
	<string>System</string>
	<key>PayloadType</key>
	<string>Configuration</string>
	<key>PayloadUUID</key>
	<string>183F63FC-A94F-44F6-AF62-D3D68FDAE755</string>
	<key>PayloadVersion</key>
	<integer>1</integer>
</dict>
</plist>
Where to find the profile
Follow these steps to find the profile:
Navigate to https://supportportal.CrowdStrike.com/s/article/ka16T000000wtMWQAY.
Click Login with Falcon.
Select your login type (in my case, I had to log in with US-2).
Enter Xcreds provided to you from CrowdStrike upon initiating an account or trial.
Click this link once more to auto-populate the webpage, or search for the page title:
Using Mobile Device Management (MDM) to sync profiles before installing or upgrading the Falcon sensor for Mac.
Scroll all the way down to the bottom of the support page.
You should see a downloadable file under Additional Information titled Falcon Profile – no Kext.
Click Preview and Download.
Locate the document file under the name Falcon Profile – no Kext and have it ready for the next section.
Loading...
Since macOS Big Sur 11.0, CrowdStrike no longer provides an additional Kext-compatible profile (per company support representative). Please note that at the time of publishing, not all CrowdStrike support documentation has been updated to reflect this. |
2. Upload CrowdStrike's configuration profile as a custom config
Once you've downloaded CrowdStrike's custom .mobileconfig profile, it's time to upload it to your MDM as a custom configuration profile. Let's walk through how to tackle this step in SimpleMDM.
To upload the profile to SimpleMDM, follow these steps:
Navigate to Configs > Profiles.
Click Create Profile.
Click Custom Configuration Profile.
Name your profile.
Click Choose File and select Falcon Profile – no Kext file (or copy and paste XML payload).
Check the box for macOS devices, deploy as a device profile instead of a user profile.
Check the box for Re-install profile automatically after macOS software updates are detected.
Click Save.
Loading...
3. Deploy CrowdStrike's custom .mobileconfig through your MDM
To assign the profile you just created to Device Groups, follow these steps:
Go to Devices > Groups.
Select the predefined group that you would like to push the profile to.
Click the Profiles tab on the Group Details page.
Click Assign Profile.
Search the name of the Custom Profile you just created.
Click Assign.
You should now see your Custom Profile listed under Profiles on the Group Details page.
(Pssst: You may want to brush up on creating a custom profile in SimpleMDM.)
Loading...
4. Download Falcon Sensor through MDM as a custom app
CrowdStrike uses a proprietary application called Falcon Sensor to deploy its agent. At the time of publication, this application cannot be found on the App Store or within SimpleMDM Shared Apps. But no worries! I'll show you where to find this priceless .pkg. (You can also follow along with CrowdStrike's instructional video.)
Get the .pkg
Follow these steps to find the .pkg:
While logged into CrowdStrike, navigate to Host setup and management > Deploy > Sensor downloads.
Find macOS Sensor on the download list.
Click Download.
The file should download as FalconSensorMacOS.MaverickGyr.pkg
Loading...
Find your CrowdStrike Customer ID
We need to grab your Customer ID for the after-install script to license the Falcon Sensor applications successfully. Since I know you're a multitasker, let's do this while we're already on the page.
Follow these steps to find the ID:
While still logged into CrowdStrike, copy your Customer ID checksum (CCID) from Host setup and management > Deploy > Sensor downloads.
Look at the gray box at the top of the page.
Find the ID listed under Point 2 (under HOW TO INSTALL).


5. Upload CrowdStrike Falcon Sensor app to your MDM as a custom app
Now that we have the most up-to-date application, we can perform a mass deployment of the App to our endpoints through our chosen MDM. For this step, I recommend taking the auto-deployment approach. That means the application will appear in your user's application folder without user intervention. If you follow along with SimpleMDM, we will deploy the .pkg as a Managed application through Munki.
Here's how to deploy .pkg as a custom app through Munki:
Navigate to Apps & Media.
Click Catalog.
Click Add App in the upper right-hand corner.
Select Custom App from the drop-down menu.
Click Browse Files or drag and drop Falcon SensorMacOS.MaverickGyr.pkg.
Hit Upload.
Check that the upload is complete.
Loading...
Now the custom app should reflect this corresponding screenshot:

6. Create personalized after-install script
We must add an after-install script to the custom application we created to license each endpoint.
Here's how to create the after-install script:
1. Go to Apps & Media > Catalog > Falcon Sensor App.

2. Click the Munki tab

3. Scroll down to Scripts.

4. Find After Install box.

5. Copy and paste the following in the After Install box:
|
6. Enter your Customer ID in place of {{license-key}} in the above script.
7. Set the Install Priority box to the lowest priority (10) to give the custom profile more time to deploy before the Falcon Sensor app if needed.
8. Save.

7. Auto-deploy the application to desired endpoint groups
Here's how you can auto-deploy (or assign) the application:
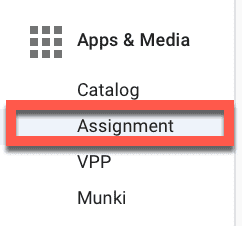
Once the after-install script has been added to the custom application, go to Apps & Media > Assignment.
Select the desired assignment group to which you want to deploy the Falcon Sensor app. For auto-deployment, we will be choosing a Munki, Managed assignment group.

In this example, I've added the App to my managed App for auto-deployment. This means the .pkg should appear in the user's application library. This sync should typically happen within an hour if the receiving endpoints are online and reachable by SimpleMDM.

Dictate what device groups or individual machines you'd like to deploy this managed App to.
Click Actions > Update Catalog after adding the App to the app group, just to be thorough.
Repeat these steps if you'd like to add to any other assignment groups.


8. Test your deployment
You deployed all the pieces of this CrowdStrike puzzle — way to go! But you still want to make sure that your deployment was successful.
Here are a few terminal commands you can run on your endpoints to check for agent connectivity:
1. Open the Terminal application on your test endpoint within an Admin user.
2. Copy and paste the following into Terminal:sudo /Applications/Falcon.app/Contents/Resources/falconctl stats
The Terminal output should look like the following when successful:

3. For the second command, enter:
sudo systemextensionsctl list
The terminal output should look like the following when successful:

Additional tidbits
VPN
Successful CrowdStrike deployment requires port 443 open on VPN per CrowdStrike documentation.
Endpoint Firewalls
If you're using an endpoint firewall on your host, it must be configured to allow access to the CrowdStrike domains. Customers have reported that these products require additional configuration when used with the Falcon sensor:
Ad-Aware Pro Security
Avast Internet Security
AVG Internet Security
BullGuard Internet Security
Dr. Web Security Space
MylnternetSecurity Prevention A/V + Firewall
UnThreat Internet Security
VIPRE Internet Security
ZoneAlarm Internet Security Suite
Chili Internet Security
ESET Node32 Smart Security
BITDEFENDER Total Security
TrustPort Internet Security
Link Reference |
|---|
Deployment Documentation: https://falcon.us-2.crowdstrike.com/documentation/22/falcon-sensor-for-mac |
CrowdStrike KB Portal: https://supportportal.crowdstrike.com/ |
Falcon Sensor Instructional Video: https://www.crowdstrike.com/blog/tech-center/how-to-install-the-falcon-sensor-for-mac/ |
Terminal Command Reference |
|---|
|
|
|
|
|
CrowdStrike can be daunting to deploy — but it doesn't have to be! Just bring a little confidence, and SimpleMDM can help with the rest.
If you don't have an MDM to help make your CrowdStrike Deployment Pretty Damn Quick, try SimpleMDM for free!


