Want to know how to add a Mac to Apple Business Manager but not quite sure where to start?
Historically, adding devices to Apple Business Manager or Apple School Manager has required purchasing them through a formal business or education account with Apple or an Apple Authorized Reseller. Following the purchase, the buyer could input the order number into Apple Business Manager and have these devices automatically synced to their ABM account.
With iOS 11+, Apple further expanded this feature so any iOS device could be provisionally added to Apple Business Manager by using Apple Configurator 2 on a Mac. This makes it easier than ever to manage Mac and Apple devices.
This is a significant advantage to companies that procure enterprise iOS devices through other common channels, including retail sources like Best Buy, Amazon, and other third-party resellers. Companies now can add these devices to Apple Business Manager and take advantage of Automated Enrollment.
This same capability is also available to add newer (post-2018) Macs with a T2 or M series Silicon chip running macOS 12.0.1 or later (and can add iPhones and iPads to ABM as long as they are running iOS 16 or later) using the Apple Configurator app, specifically on iPhone.
Ready to learn how to use the Apple Configurator app on an iPhone to manually add a macOS device to Apple Business Manager? 👀
Note: While this article explicitly mentions Apple Business Manager, the same instructions are valid for Apple School Manager. |
Prerequisites
A Mac with an Apple Silicon or T2 chip and macOS 12.0.1 or later. This is the device to which you’ll add Apple Business Manager.
Ensure you have connected an MDM server from Apple Business Manager to SimpleMDM. If this is your first time, see our SimpleMDM Help Center for instructions.
An iPhone running iOS 15+ with the Apple Configurator for iPhone app installed.
Because I constantly mix them up:
Apple Configurator 2 = macOS only app. Download on the Mac App Store.
Apple Configurator = iOS only app. Download in the App Store for iPhone (not functional on iPadOS at the time of publishing).
How to add a Mac to Apple Business Manager with Apple Configurator
1. Open & sign in to the Apple Configurator App
Open the Apple Configurator app on your iPhone and accept the terms.
Sign in to the app with a Managed Apple ID from your Apple Business Manager account. This Managed Apple ID should have ABM role permissions of:
Owner
Administrator
or Device Enrollment Manager
You may be prompted to sign in with two-factor authentication.
2. Make sure the device is erased and plugged into power
Have the Mac you want to add in front of you and plugged into a power source.
If the Mac has already gone through the Setup Assistant process, you need to erase it before proceeding to the next step.
See Apple’s documentation for instructions on how to erase a Mac.
If the Mac is brand new and has not been set up, move on to the next step.
3. Launch Setup Assistant and establish internet connection
Start the Setup Assistant steps, and make sure your Mac is connected to the internet during the process.
You first need to select the language. If you continue past the Country or Region setup pane, something in your flow hasn't registered correctly, and you will need to restart your Mac and try again.
4. Use iPhone camera to pair iPhone and Mac through Apple Configurator
Hold your iPhone — with the Apple Configurator App open — close to the Mac (about NFC distance from one another).
You should see a screen that says "Assign this Mac to Your Organization."
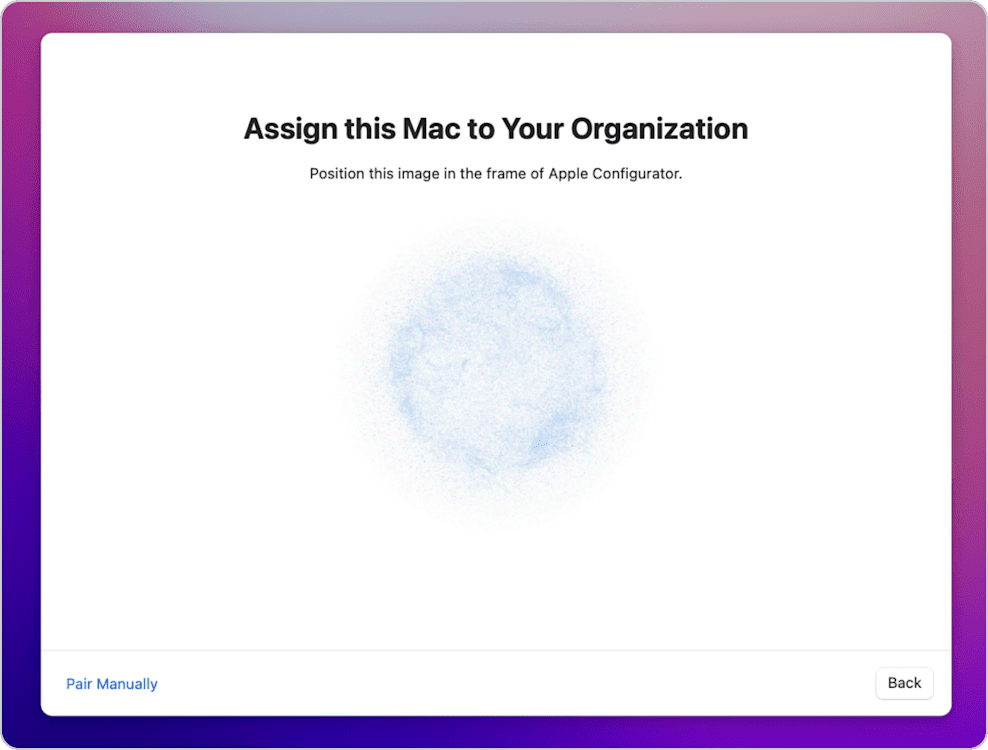
From this screen, you have two options:
Use the iPhone camera (with the Apple Configurator app open) to scan the image on the screen.
Select Pair Manually on the iPhone and click Pair Manually on your Mac. You will be shown a 6-digit code and be prompted to enter it.
You should see a notice on the screen saying the pairing was successful.
Note: If you have not already signed in with your Managed Apple ID from Apple Business Manager in Apple Configurator on iOS, it will prompt you to do so. Make sure to complete this step if you are prompted.
5. Confirm you've added your Mac to Apple Business Manager
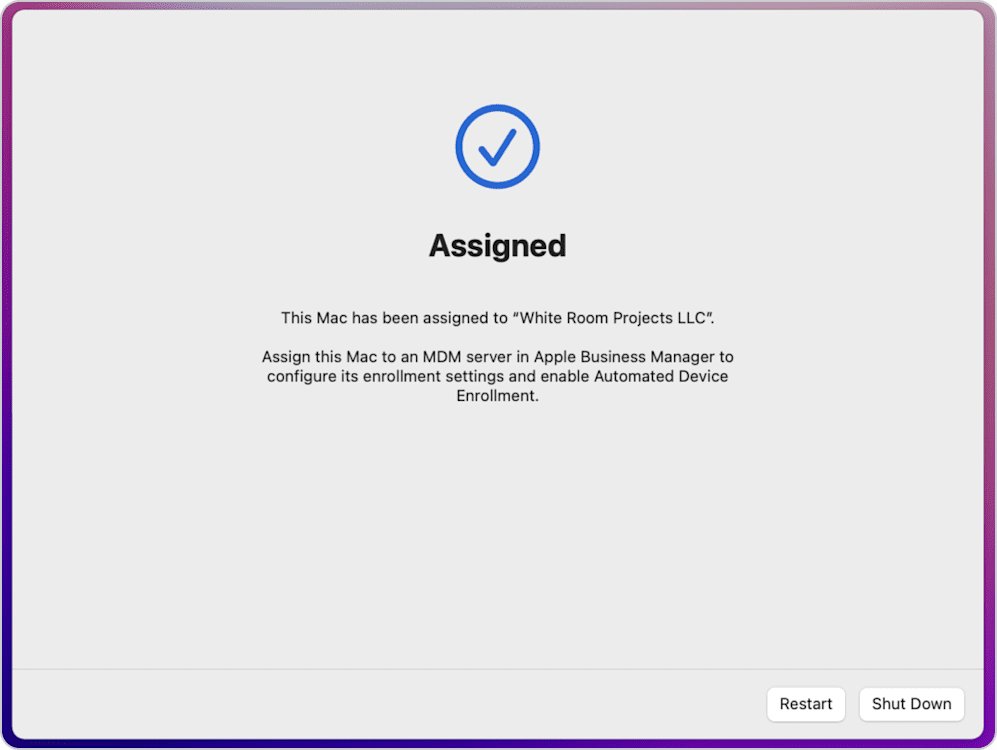
You should next see a screen stating, "This Mac has been assigned to [your organization name]." This means the device has been successfully added to your Apple Business Manager account.
Keep in mind: at this point, the device has not yet been enrolled in MDM.
On the Mac screen, you will see the options to Restart or Shut Down. But don’t take any action just yet... good things come to those who wait.
Enroll the Mac in SimpleMDM using Automated Device Enrollment
Now that you've added the device to your Apple Business Manager account, it's time to enroll it into an MDM. We'll show you how to do this in SimpleMDM.
1. Log into Apple Business Manager
Log in to your ABM account.
2. Find serial number in ABM
Go to the Devices section in Apple Business Manager.
Search for the serial number of the device you just added.
3. Identify assigned MDM Server
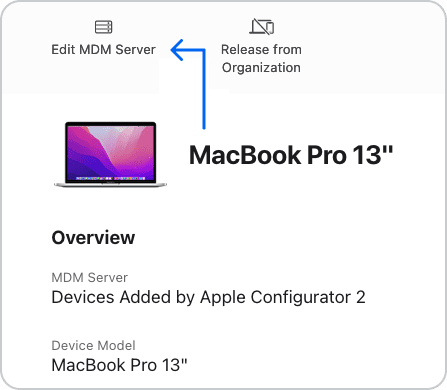
Click the device.
You will see that it's assigned by default to the MDM Server called "Devices Added by Apple Configurator 2."
Click Edit MDM Server.
4. Edit MDM Server to SimpleMDM
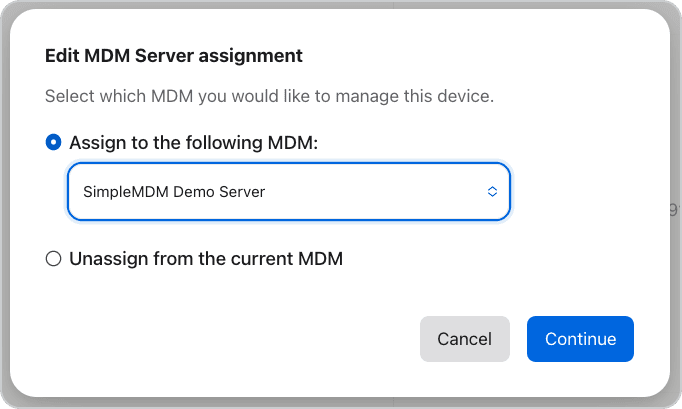
Select Assign to the following MDM.
Select the name of the MDM server connected to your SimpleMDM account.
Click Continue to confirm the assignment.
5. Log into your SimpleMDM account & verify device addition
Log in to your SimpleMDM account.
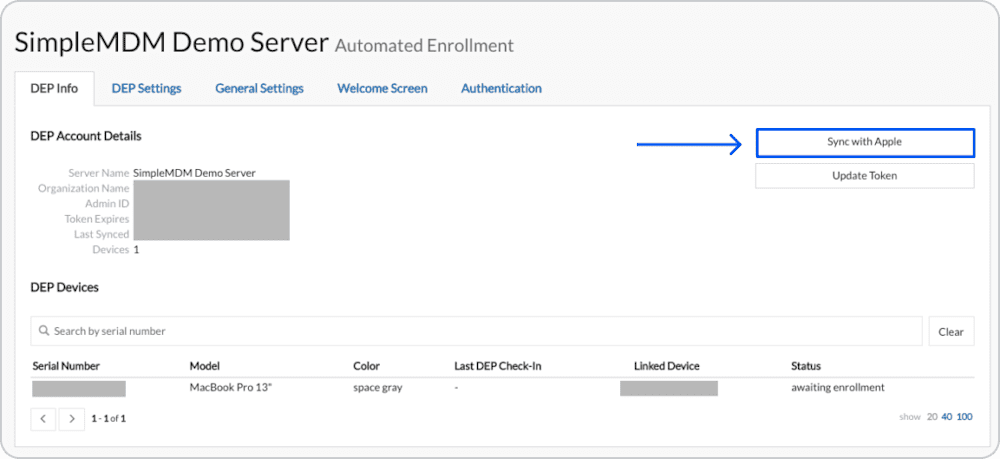
Go to the Automated Enrollment page that corresponds with the MDM server in Apple Business Manager.
Click Sync with Apple on this page.
Refresh the page to confirm the device’s serial number is showing in the DEP Devices list.
6. Restart Mac
Click Restart on your Mac and wait for macOS to reboot.
Note: If you restarted your Mac and started the Setup Assistant process before successfully assigning and syncing the device with a server connected to SimpleMDM, you may need to finish Setup Assistant and then erase your Mac again. |
7. Perform Setup Assistant after reboot
After restarting, follow the prompts for the next steps:
Select country or region.
Configure accessibility settings.
Connect to Wi-Fi.
Continue through any other setup panes.
8. Confirm successful check-in & proceed with Automated Enrollment
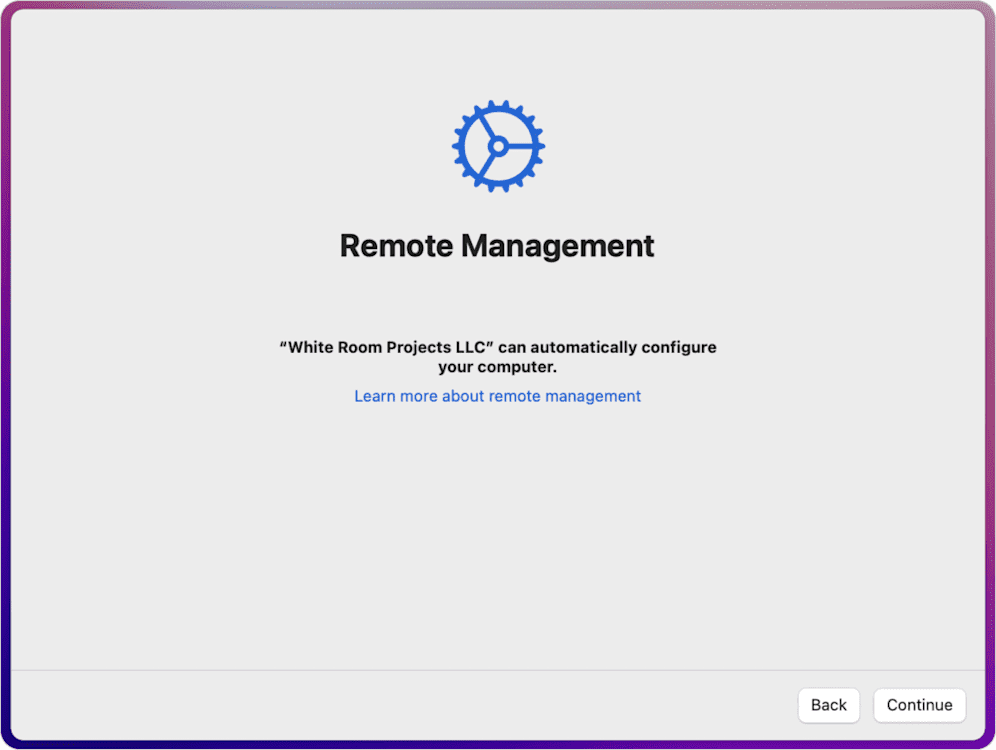
During the setup after reboot, you should see a Remote Management screen that now shows your rganization's name.
This screen confirms that the device has successfully checked in with the server and will proceed with the Automated Enrollment process.
Click Continue to complete the remaining setup steps.
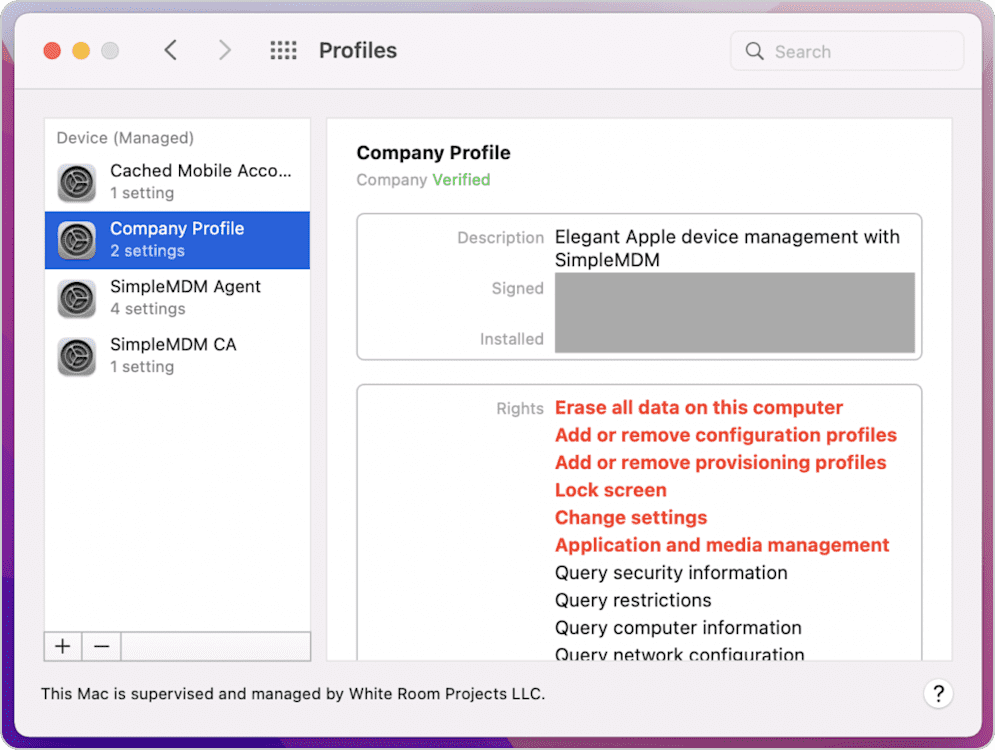
Once you have finished Setup Assistant, your device should now be enrolled in your MDM.
You can confirm the enrollment by opening System Settings > Profiles and verifying that the MDM profile is now listed.
Going further with SimpleMDM
SimpleMDM supports many options to help customize and automate the Setup Assistant experience, including the ability to skip setup panes automatically, set a custom welcome screen for your users, enforce SAML authentication or LDAP authentication to automate the macOS user account setup process using credentials from your identity provider, and more. See our SimpleMDM Help Center for more information on these topics.
How to add a Mac to Apple business manager FAQs
If I can add a Mac to Apple Business Manager, can I also add iOS devices to Apple Business Manager with Apple Configurator for iPhone?
Yes, as of iOS 16, you can add iOS devices to Apple Business Manager with Apple Configurator for iPhone.
Apple Configurator for iPhone can also be used to add iOS devices to ABM as long as both the configuration iPhone device and the target iOS device are running iOS 16 or later.
Can I run Apple Configurator for iPhone on my iPad?
No, not at this time. The device performing configuration must be an iPhone.
Maximizing your organization's productivity starts with taking full control of your devices, and Apple Business Manager + SimpleMDM are here to help.
Manage your devices yourself? Try SimpleMDM for free for 30 days and see how it enhances efficiency and simplifies device management.

