In Munki, PkgInfo is a metadata file with information on the package and its installation. Customizing the PkgInfo manifest allows Munki admins greater control over the deployment process. We’ll explain the basics of Munki PkgInfo files, how to customize them, and when to use them.
Hungry to learn more about Munki and SimpleMDM? Read up on SimpleMDM’s hosted Munki integration and how to use NoPkg. |
What is a Munki PkgInfo file?
A PkgInfo manifest is an XML file that contains package metadata about the app being installed. It also dictates certain aspects of the installation behavior. Traditionally generated with the makepkginfo tool, this file clarifies what the package includes, where to install it, and what actions to perform during the installation process. It may also incorporate scripts to execute before and after installation. Essentially, the Munki client reads the PkgInfo file for more information to guide the installation.
Common XML file contents include the following:
Package name
Version of the software package
Package identifier
Bundle identifier
Installation dependencies or prerequisites
The file may also include scripts or commands for the following phases of the installation lifecycle:
Pre-installation
Installation
Post-installation
Pre-removal
Uninstallation
Post-removal
Additionally, you can use the PkgInfo command to retrieve information on an installed package. This data can be helpful for troubleshooting, verifying successful installation, and determining whether you should update the package.
While PkgInfo files are not required, they have to exist for Munki to install them. However, they don't always need to be customized.
Why would I want to customize the PkgInfo?
Customizing the PkgInfo allows a Munki admin to adjust the installation process to meet business needs. Munki enables you to create or modify a PkgInfo manifest, giving administrators a high degree of control over the end-user experience when apps are installed. Granular control over the installation and updates enhances dependency management, allows version control, and streamlines the Apple software update process.
How to customize PkgInfo
Create or modify the associated XML file to customize PkgInfo. We’ll break down some basic steps for these processes.
Create PkgInfo manifest
Use the munkiimport command-line tool to import your software package of choice
Customize the Munki manifest in a text, PLIST, or XML editor
Save the manifest to a directory in your Munki repository (Munki repo) as a PLIST file
Try out the package installation in a test environment
Looking for an easier option? SimpleMDM generates the PkgInfo file automatically for Shared Apps and apps uploaded using the SimpleMDM Catalog
Modify an existing PkgInfo manifest
Locate the PLIST PkgInfo file in the relevant directory in your Munki repository
Open the file in a text, PLIST, or XML editor
Modify it as needed
Save the modified version as a PLIST file to the original directory
Update the package in Munki using the munkiimport command-line tool
SimpleMDM users can edit PkgInfo files directly within the SimpleMDM admin interface.
How to customize PkgInfo in SimpleMDM
Let’s look at an example of how to customize the PkgInfo of a package in SimpleMDM using the Munki integration.
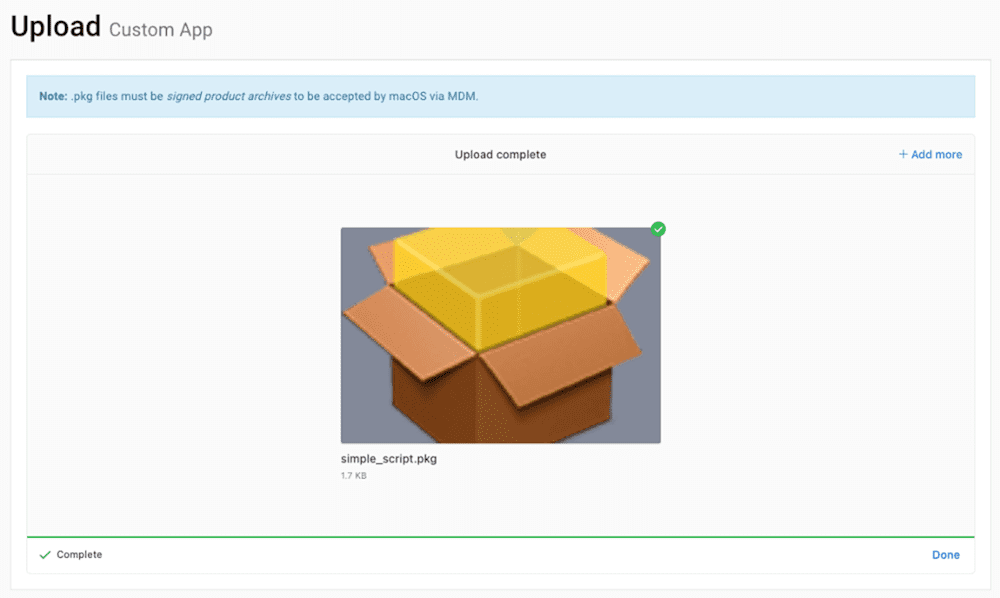
First, upload your package to the SimpleMDM Catalog. For our example, we’ll use a package we created called simple_script.pkg.
Next, click the package name in the Catalog list, and click the Munki tab. Then, check the Use custom PkgInfo box to allow edits to the automatically generated PkgInfo file.
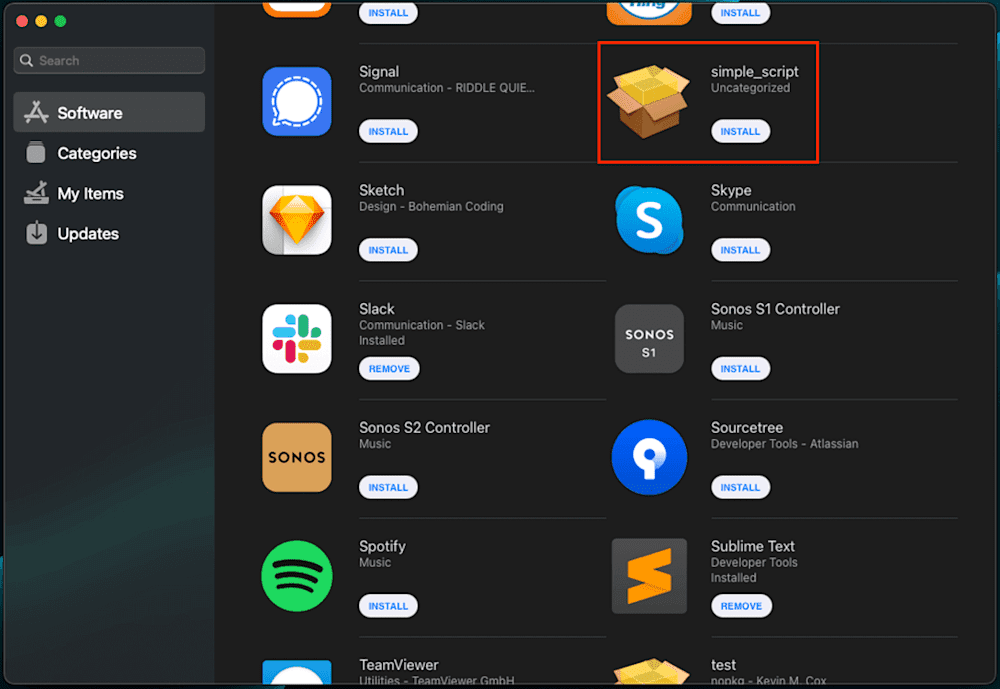
Now, modify the PkgInfo by editing the file or uploading your own. For this example, we’ll add the OnDemand key to allow the user to run this package via Self Service from the Managed Software Center as needed (rather than just running it once for the initial install). This option is useful for packages used for maintenance or other tasks that need to be performed on unscheduled occasions.
To do this, add the following key to the PkgInfo payload:<key>OnDemand</key>
<true/>
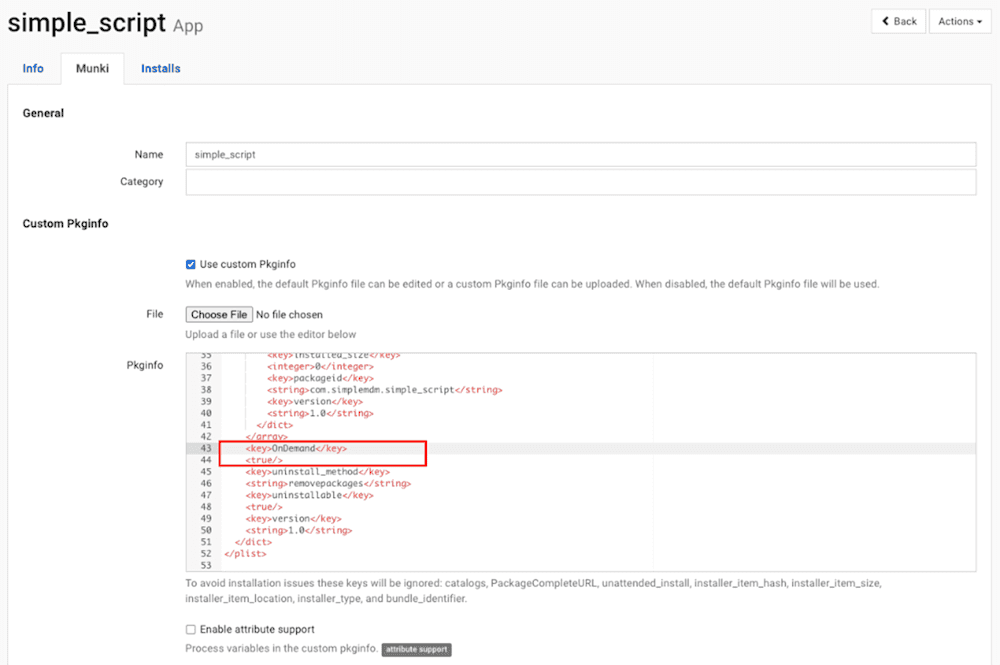
Now, save the changes and add the application to a Self-Serve Munki assignment group on the Assignments page. After doing so, run the Managed Software Center, and it should appear with the option to install repeatedly.
PkgInfo use cases
PkgInfo gives you more control over software installation, updating, and removal, so the use cases are expansive. Here are a few common examples of what you might do with PkgInfo:
Force a restart after installing an app
Change the description of an app in the Managed Software Center
Disable user removal of apps
Specify OS version
Configure pre-install, post-install, pre-removal, and post-removal scripts that run automatically
Manage dependencies and conditional items
Set installation order
Change the file destination on a client machine where the app is installed
Control what kind of prompts a user sees when an update is required
With SimpleMDM’s Munki integration, PkgInfo files automatically generate for apps by default. From there, you can easily customize the XML within the interface or upload your own file. Sign up for a free 30-day trial of SimpleMDM to see how seamlessly you can generate and modify PkgInfo files.

